
Table of contents
- Introduction to the Gortidas de Nata Recipe
- The History Behind Gortidas de Nata and Its Popularity
- Essential Ingredients for the Perfect Gortidas de Nata
- Tools and Equipment Needed for a Successful Gortidas de Nata Recipe
- Step-by-Step Instructions for Making Gortidas de Nata Pastries
- Secrets to Baking the Best Gortidas de Nata Every Time
- Common Mistakes to Avoid in Your Gortidas de Nata Recipe
- Creative Variations and Flavor Twists for Gortidas de Nata
- Healthier Alternatives
- Pairing Suggestions
- Storage Tips and Shelf Life
- Frequently Asked Questions (FAQs)
Estimated reading time: 13 minutes
Introduction to the Gortidas de Nata Recipe
The gortidas de nata recipe is a traditional dessert that captures the essence of rich, creamy flavors and time-honored baking techniques. Originating in Portugal, this dish has become a beloved treat in many households, known for its buttery layers and velvety custard filling. Gortidas de nata, often mistaken for the famous pastel de nata, offers a slightly different twist while maintaining the same sweet appeal. This dessert is perfect for any occasion, from casual family gatherings to special celebrations. Its delicate pastry crust, filled with a smooth custard base, creates a balance of textures and flavors that are sure to impress.
What makes the gortidas de nata recipe so special is its simplicity paired with its indulgent taste. While the steps to create this delightful pastry may seem intricate, they are well worth the effort. In this article, we will guide you through every stage of making these irresistible pastries, ensuring that you can recreate the perfect gortidas de nata right at home.
The History Behind Gortidas de Nata and Its Popularity
The gortidas de nata recipe is a sweet reflection of Portugal’s rich pastry tradition, deeply rooted in its history. Like many classic Portuguese desserts, this pastry has ties to the country’s monasteries, where monks often used egg yolks in creative ways. Back in the 18th century, when monasteries were known for their baking, leftover egg yolks were put to good use in making custards and creams. This led to the creation of various desserts, including the ancestor of the gortidas de nata.
While the gortidas de nata shares some similarities with the well-known pastel de nata, it’s distinguished by a unique combination of a crispy, buttery crust and a smooth, rich custard filling. Over time, it evolved and became beloved across Portugal, often served at celebrations or family gatherings.
The recipe has endured for centuries, passed down from generation to generation, maintaining its place in Portuguese homes as a reminder of the country’s deep culinary heritage.
Essential Ingredients for the Perfect Gortidas de Nata
The gortidas de nata is a relatively simple dessert, but the quality of its ingredients makes all the difference. When making these delicious pastries, choosing the right ingredients will ensure the perfect texture and taste. Here’s a closer look at what you’ll need to make them:
- Butter: The star ingredient for the crust. Butter is what makes the pastry so flaky and tender. It creates a delicate, melt-in-your-mouth experience that’s the hallmark of gortidas de nata. Using high-quality butter gives the pastry its rich flavor and golden-brown color.
- Flour: All-purpose flour is what binds the dough together. It helps create a crust that’s crisp and light, yet sturdy enough to hold the creamy custard filling without falling apart. It’s essential for a smooth dough that can be rolled thin and baked to perfection.
- Eggs: Eggs are central to the custard filling, providing structure and richness. They give the custard its smooth, velvety texture that contrasts beautifully with the flaky pastry. The eggs also contribute to the color, turning the custard a lovely golden hue as it bakes.
- Sugar: Sugar is used in both the dough and the custard. In the pastry, it adds just the right amount of sweetness to balance out the buttery flavor. In the custard, sugar helps to round out the rich, eggy base, making the filling perfectly sweet and indulgent.
- Milk: Full-fat milk adds to the creamy texture of the custard filling. It helps create that soft, melt-in-your-mouth consistency that defines the gortidas de nata. It also lightens the custard without compromising its richness.
Together, these ingredients combine to make the gortidas de nata an unforgettable treat. The butter and flour create a tender, flaky base, while the eggs, sugar, and milk form the rich, smooth custard filling that makes each bite so satisfying. The beauty of this dessert lies in the simplicity of its ingredients—each one contributes something special to the overall experience.
For those who enjoy experimenting with new flavors, you can try adding a layer of gortidas de nata recipe variations with chocolate or almond twists, creating an even more unique and indulgent experience.
Tools and Equipment Needed for a Successful Gortidas de Nata Recipe
To make gortidas de nata, having the right tools and equipment is essential for achieving the perfect pastry. While the ingredients are simple, the preparation requires some specific items to ensure the process runs smoothly.
- Mixing Bowls: A set of sturdy mixing bowls is necessary for combining your ingredients. You’ll need separate bowls for preparing the dough and custard filling. Choosing bowls that are large enough to handle the ingredients comfortably makes the process easier.
- Rolling Pin: A rolling pin is vital for rolling out the dough thinly and evenly. You want the dough to be as thin as possible without tearing, so a good rolling pin will help achieve that.
- Whisk: A whisk is essential for mixing the custard filling. It ensures that the eggs, sugar, and milk are well combined and smooth, without any lumps.
- Measuring Cups and Spoons: Accurate measurements are key to making sure the recipe turns out just right. Measuring cups and spoons will help you stick to the correct proportions for both the dough and custard.
- Muffin Tin or Tartlet Molds: These will be used to shape the gortidas de nata as they bake. The size of the molds will determine the final shape and size of the pastries.
- Baking Tray: A baking tray is needed to set the tart molds on while baking. It ensures that the heat is evenly distributed, helping the gortidas de nata bake evenly.
These tools will help you create the perfect pastry, from mixing and rolling to baking. Having the right equipment will make the process smoother, so you can focus on creating a delicious dessert.
Step-by-Step Instructions for Making Gortidas de Nata Pastries
Making gortidas de nata is a rewarding process that requires attention to detail. Here’s how you can prepare this delicious pastry at home:
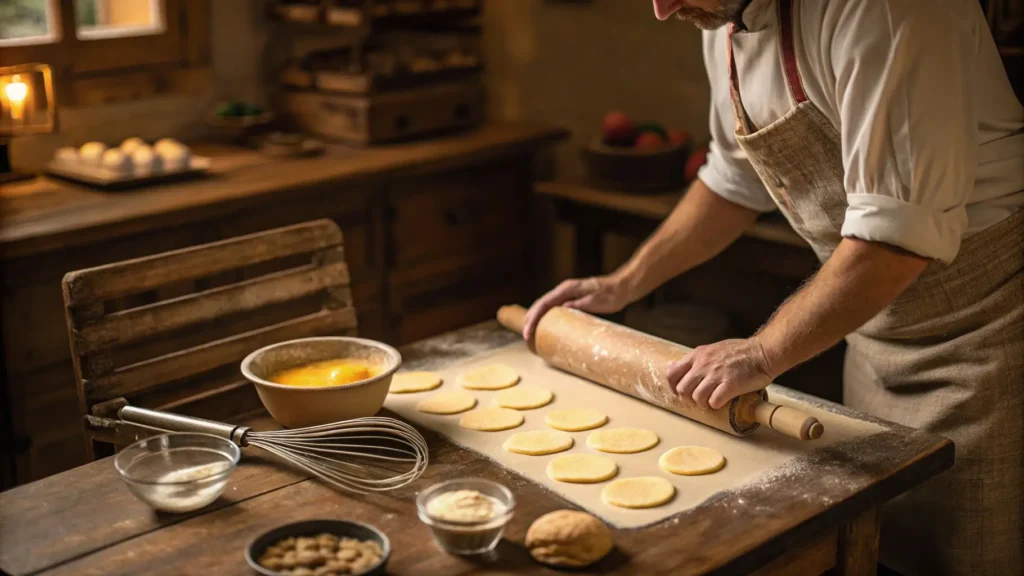
- Prepare the Pastry Dough: Start by combining the flour and a pinch of salt in a mixing bowl. Gradually add cold butter and mix until it forms a crumbly texture. Slowly incorporate cold water, a little at a time, until the dough comes together. Knead it briefly to form a smooth ball, then wrap it in plastic wrap and refrigerate for at least 30 minutes.
- Make the Custard Filling: In a saucepan, whisk together the milk, sugar, and eggs. Place the mixture over low heat and stir constantly until it thickens into a custard. Once thickened, remove it from the heat and let it cool slightly.
- Assemble the Pastries: Roll the dough out on a lightly floured surface. Cut it into rounds that fit your tartlet molds. Gently press the dough into the molds, then fill each with the custard mixture.
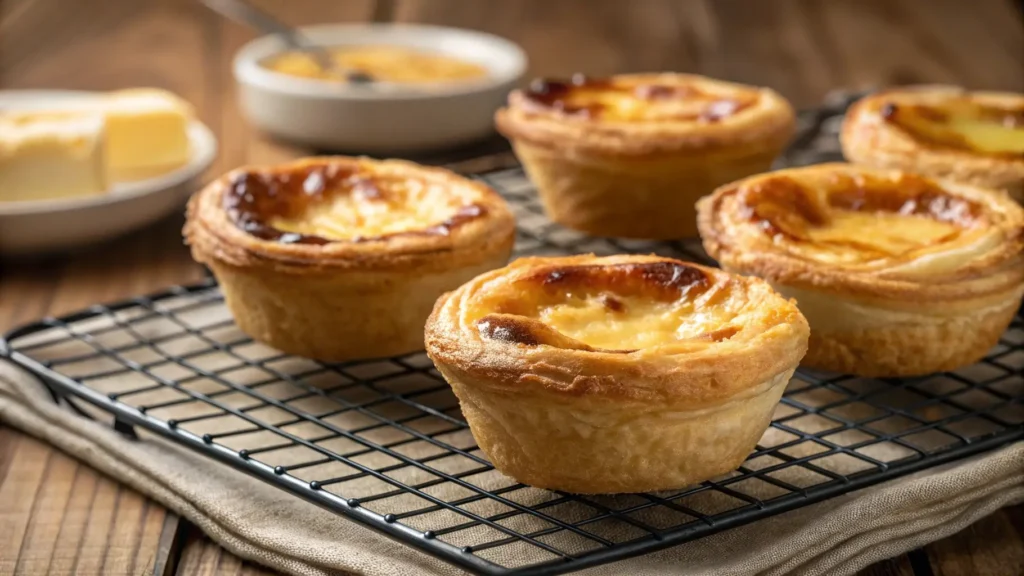
- Bake: Preheat your oven to 375°F (190°C). Bake the pastries for 20-25 minutes or until the custard is golden and the pastry is crisp.
- Cool and Serve: Allow the gortidas de nata to cool slightly before serving. Enjoy the delicate, creamy texture paired with the buttery crust.
This step-by-step method makes it simple to recreate these traditional Portuguese pastries at home.
Secrets to Baking the Best Gortidas de Nata Every Time
Achieving the perfect gortidas de nata requires more than just following the recipe—it’s all about mastering the details. Here are a few key tips to make sure your pastries turn out perfectly every time:
- Cold Ingredients: For a flaky and tender crust, it’s essential to keep your ingredients cold. Cold butter, flour, and even the water help create the layers needed for a crisp pastry. The dough should feel firm and slightly chilled when you roll it out.
- Don’t Overwork the Dough: When preparing the dough, avoid overmixing. Gently bring the dough together and handle it as little as possible. Overworking the dough will lead to a tougher texture, rather than the light, flaky finish you want.
- Constant Stirring for the Custard: As you make the custard filling, keep stirring it constantly over low heat. This helps avoid any lumps and ensures a smooth, velvety texture. Once the custard thickens, remove it immediately from the heat.
- Proper Baking Temperature: Preheating the oven to the right temperature is crucial. Bake the gortidas de nata until the custard is golden and set. If your oven tends to bake unevenly, rotate the tray halfway through.
By following these tips, you’ll create gortidas de nata that have a buttery, flaky crust and a smooth, creamy filling—just like the traditional Portuguese version.
Common Mistakes to Avoid in Your Gortidas de Nata Recipe
When making gortidas de nata, it’s easy to make a few mistakes that can affect the final result. Here are some common pitfalls and tips on how to avoid them:
- Overmixing the Dough: One of the biggest mistakes is overworking the dough. If you mix the dough too much, it can become tough and lose its delicate texture. To avoid this, handle the dough as gently as possible and only mix it until the ingredients just come together.
- Incorrect Custard Consistency: If the custard is too thin or too thick, the pastries won’t bake properly. To avoid this, cook the custard on low heat and stir constantly. It should be thick enough to coat the back of a spoon but still smooth and pourable.
- Not Chilling the Dough: Skipping the chilling step for the dough can result in a crust that doesn’t puff up properly when baked. Always refrigerate the dough for at least 30 minutes before rolling it out.
- Overfilling the Pastry: Adding too much custard can cause the filling to spill over while baking. Only fill each pastry about three-quarters full to give the custard room to expand during baking.
By being mindful of these common mistakes, you can create gortidas de nata that have the perfect balance of crisp pastry and smooth, creamy filling.
Creative Variations and Flavor Twists for Gortidas de Nata
While the traditional gortidas de nata is already a delightful treat, there are many ways to add a unique twist to the recipe. Here are a few variations and flavor ideas to consider:
- Citrus Zest: For a fresh, zesty kick, add a bit of lemon or orange zest to the custard filling. This brings a light, aromatic flavor that contrasts beautifully with the richness of the custard.
- Spiced Custard: Add a pinch of cinnamon, nutmeg, or even cardamom to the custard mixture. The warmth of these spices complements the creamy filling and gives the pastry a comforting, seasonal touch.
- Almonds or Hazelnuts: For a nutty twist, chop up some almonds or hazelnuts and sprinkle them on top of the custard before baking. The nuts add a crunchy texture and a pleasant contrast to the smooth filling.
- Chocolate Filling: For a more indulgent version, try adding a layer of dark chocolate to the custard filling. The rich chocolate pairs well with the buttery crust and adds depth to the flavor.
- Fruit Compote: Top the gortidas de nata with a small dollop of berry compote or caramelized apples for a fruity contrast that balances the richness of the custard.
By trying out these variations, you can give your gortidas de nata a personal touch, turning a classic dessert into something uniquely your own.
Healthier Alternatives
While gortidas de nata is a delicious indulgence, there are several ways to make the recipe a bit healthier without sacrificing flavor. Here are some ideas to modify the ingredients:
- Whole Wheat Flour: Swap out all-purpose flour for whole wheat flour. This option provides more fiber and nutrients while maintaining the texture of the pastry. It adds a slightly nuttier flavor that complements the rich custard filling.
- Butter Substitution: Instead of using regular butter, you can opt for a lighter version, such as unsweetened applesauce or Greek yogurt. These alternatives lower the fat content while still providing a moist texture for the dough. If you prefer to stick with butter, consider using a grass-fed variety for more beneficial fats.
- Lower-Sugar Custard: Reduce the amount of sugar in the custard filling or substitute it with a natural sweetener like honey or maple syrup. This reduces the overall sugar content while still delivering a sweet taste.
- Almond Milk or Coconut Milk: For a dairy-free option, replace the whole milk with almond milk or coconut milk. These plant-based options still provide creaminess but with fewer calories and saturated fats.
- Egg Alternatives: You can try replacing the eggs with flaxseed or chia seed mixtures for a vegan version of gortidas de nata. These alternatives help maintain the structure of the custard while cutting down on cholesterol.
By making these simple swaps, you can enjoy a lighter version of this beloved pastry without compromising on taste.
Pairing Suggestions
Gortidas de nata are a delightful dessert on their own, but pairing them with the right beverages and sides can make for a more complete experience. Here are some ideas for the perfect pairings:
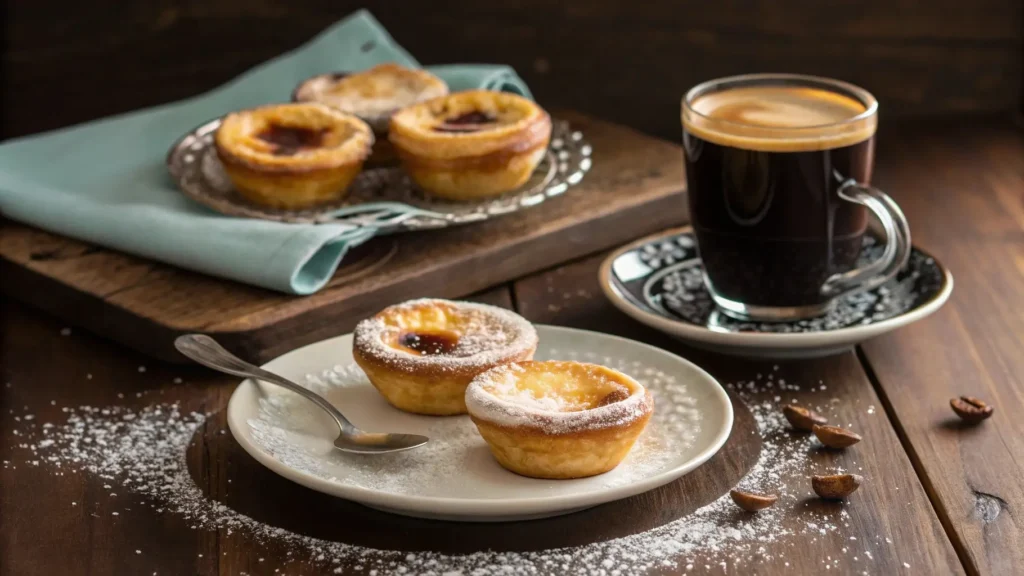
- Coffee: A rich, dark roast coffee is an excellent match for the buttery, creamy gortidas de nata. The boldness of the coffee complements the sweetness of the custard, providing a balanced contrast.
- Espresso: If you prefer something stronger, an espresso pairs beautifully with the pastry. The intense, concentrated flavor of the espresso highlights the delicate custard filling, creating a harmonious blend of bitter and sweet.
- Tea: For a lighter pairing, a black or green tea works well. A mild Earl Grey or a refreshing jasmine tea can bring out the richness of the custard without overpowering the flavor.
- Fresh Berries: Serve your gortidas de nata with a side of fresh berries, like raspberries or blueberries. The tartness of the berries offers a pleasant contrast to the sweetness of the pastry and adds a refreshing touch.
- Ice Cream: For a more indulgent treat, pair the pastries with a scoop of vanilla or cinnamon ice cream. The cold ice cream complements the warm, creamy custard filling, creating a delightful contrast in temperature and texture.
These pairing options allow you to enjoy gortidas de nata in different ways, whether you prefer something bold like coffee or light and refreshing like tea.
Storage Tips and Shelf Life
After making gortidas de nata, it’s important to store them properly to maintain their freshness and flavor. Here’s how to handle them to maximize their shelf life:
- Room Temperature Storage: If you plan to enjoy your gortidas de nata within a day or two, they can be stored at room temperature. Simply place them in an airtight container to keep the pastry from becoming stale. Be sure to avoid leaving them in a humid or overly warm environment, as this could affect the texture of the pastry and custard.
- Refrigeration: For longer storage, place the pastries in the refrigerator. Wrap each pastry individually or store them in an airtight container to prevent them from absorbing any moisture. Refrigerated gortidas de nata can stay fresh for about 3-4 days.
- Freezing: If you want to store them for a longer period, freezing is an option. Wrap each pastry tightly in plastic wrap or aluminum foil and place them in a freezer-safe bag or container. Gortidas de nata can last for up to 3 months in the freezer. When ready to eat, thaw them in the fridge or at room temperature, and reheat in the oven to restore the crispiness of the pastry.
By following these storage methods, you can enjoy gortidas de nata fresh for several days or even longer, preserving their delightful texture and flavor.
Frequently Asked Questions (FAQs)
Yes, you can prepare the pastries in advance. The dough can be made a day or two before and stored in the fridge. The custard filling can also be prepared ahead of time and refrigerated. Just assemble the pastries and bake them when you’re ready to serve.
To keep the pastry crisp, make sure it is baked fully before adding the custard filling. Avoid overfilling the pastries, as this can lead to sogginess. Also, storing the gortidas de nata in an airtight container after they have cooled will help preserve the texture.
Yes, if you prefer a dairy-free version, you can replace milk and butter with plant-based alternatives like almond milk or coconut milk. For the butter, try using dairy-free margarine or coconut oil for a similar texture.
If you plan to enjoy them within a couple of days, store them at room temperature in an airtight container. For longer storage, refrigerate them for up to four days or freeze them for up to three months.
1 thought on “How to Make Perfect Gortidas de Nata: A Delicious Pastry Recipe”