

This post contains affiliate links. As an Amazon Associate, I earn from qualifying purchases. This comes at no extra cost to you.
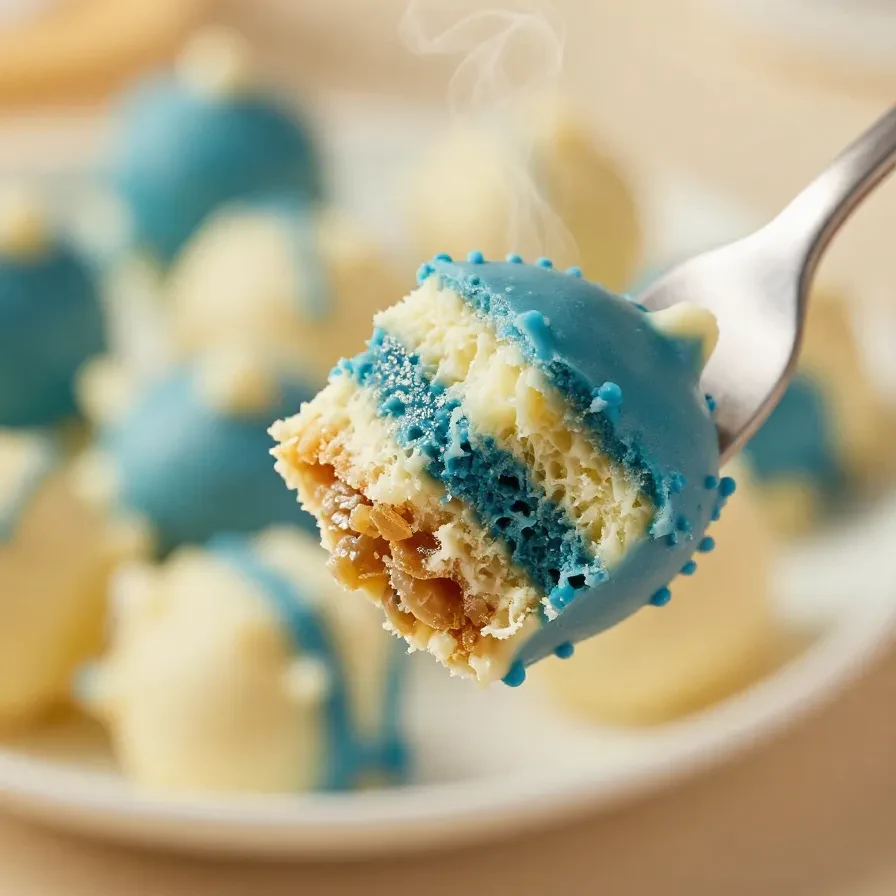
Fathers day treat box is a festive treat made with vanilla cake, frosting, and candy melts, ready in under 2 hours. This easy recipe yields 20 cake pops and offers a vibrant decorative touch with blue and white candy coatings. Perfect for adding a thoughtful homemade element to Dad’s celebration.
The creamy vanilla flavor pairs beautifully with the sweet candy shells, creating a delightful bite-sized dessert that’s as fun to make as it is to eat. When I crafted this for the first time, the joyful look on my dad’s face made these pops unforgettable.
Table of Contents
- Why make Blue and White Cake Pops for Dad’s Day?
- What ingredients do you need for Blue and White Cake Pops for Dad’s Day?
- How do you make Blue and White Cake Pops for Dad’s Day step by step?
- Frequently Asked Questions About Blue and White Cake Pops for Dad’s Day
- Serving Ideas and Pairings
- Common Mistakes to Avoid
- Meal Prep, Storage, and Reheating
Why make Blue and White Cake Pops for Dad’s Day?
Blue and White Cake Pops for Dad’s Day are perfect for celebrations because they’re easy to make, customizable, and visually striking. Their flavor and presentation make this recipe a standout for Father’s Day treat boxes.
- Simple and quick: This recipe uses a vanilla cake mix and candy melts, making it beginner-friendly.
- Personalized touch: The blue and white theme adds a festive flair tailored for Dad’s special day.
- Snackable size: Cake pops are convenient for sharing and portion-controlled eating.
- Customizable decoration: Add sprinkles or designs to match Dad’s personality or favorite colors.
What ingredients do you need for Blue and White Cake Pops for Dad’s Day?
This recipe calls for simple pantry staples like cake mix and decorating essentials. Here’s everything you’ll need:
- 1 box vanilla cake mix (plus ingredients listed on the box)
- 1/3 cup vanilla frosting
- 12 ounces white candy melts
- 12 ounces blue candy melts
- Cake pop sticks
- Sprinkles or decorations (optional)
- Vegetable oil or shortening (optional, for thinning candy melts)
Vanilla frosting binds the crumbled cake into a moldable dough, ensuring the cake pops hold their shape perfectly. Candy melts provide vibrant color and a smooth, glossy coating.
How do you make Blue and White Cake Pops for Dad’s Day step by step?
Creating Blue and White Cake Pops for Dad’s Day is a straightforward process that combines baking, shaping, and decorating.
Step 1 — Bake the Vanilla Cake
Prepare the vanilla cake according to the instructions on the box. Once baked, allow it to cool completely.
Step 2 — Crumble the Cake
Crumble the cooled cake into fine crumbs in a large mixing bowl.
Step 3 — Mix with Frosting
Add the vanilla frosting to the cake crumbs and mix thoroughly until the mixture forms a moldable dough.
Step 4 — Shape and Chill
Roll the mixture into small balls, about 1 inch in diameter, and place them on a baking sheet lined with parchment paper. Refrigerate for 1-2 hours or freeze for 30 minutes until firm.

Step 5 — Coat with White Candy Melts
Melt the white candy melts according to the package instructions. If needed, add a small amount of vegetable oil or shortening to achieve a smooth consistency. Dip the end of each cake pop stick into the melted white candy, then insert the stick halfway into each cake ball to secure it.
Step 6 — Finish with Blue Candy Melts
Once the white coating is set, melt the blue candy melts using the same method. Dip or drizzle the blue candy over the cake pops to create a decorative pattern. Add sprinkles or decorations if desired.
Step 7 — Set and Serve
Allow the cake pops to set completely at room temperature or in the refrigerator before packaging or serving.
Frequently Asked Questions About Blue and White Cake Pops for Dad’s Day
Can I use homemade cake instead of a mix?
Yes, a homemade vanilla cake works perfectly here. Just ensure the cake is moist enough to crumble easily.
How long do these cake pops last?
Stored in an airtight container, they last up to 5 days in the refrigerator or 2 months in the freezer.
What’s the best way to thin candy melts?
Add 1-2 teaspoons of vegetable oil or shortening to achieve a smoother consistency while melting.
Can I use different candy melt colors?
Absolutely! Choose any colors to match your theme or preferred style.
Do I need a cake pop stand?
A cake pop stand or styrofoam block is helpful for setting the pops upright while the coating hardens.
Serving Ideas and Pairings
Pair these Blue and White Cake Pops with:
- Our easy Father’s Day dark chocolate peanut butter cake for a rich dessert spread.
- Fresh fruit or berries for a lighter, refreshing contrast.
- Our easy Father’s Day brunch ideas to make a complete celebratory meal.
- Homemade whipped cream for dipping alongside the candy coating.
Common Mistakes to Avoid
Using too much frosting
Excess frosting can make the cake pops too sticky and hard to shape. Stick to the recommended 1/3 cup for the best consistency.
Skipping the chilling step
Cake pops that aren’t firm won’t hold on the stick during the candy coating process. Ensure they’re thoroughly chilled first.
Not thinning candy melts
Thick candy melts can create uneven coatings. Add vegetable oil or shortening for smooth dipping.
Meal Prep, Storage, and Reheating
Blue and White Cake Pops can be prepped ahead and stored for convenience. Place them in an airtight container:
- Refrigerate for up to 5 days.
- Freeze for up to 2 months.
To reheat, allow frozen pops to thaw in the refrigerator overnight. Avoid microwaving to preserve the candy coating.

Loved this recipe? Save it to your favorite Pinterest board so you can easily find it later! ✨