
This post contains affiliate links. As an Amazon Associate, I earn from qualifying purchases. This comes at no extra cost to you.
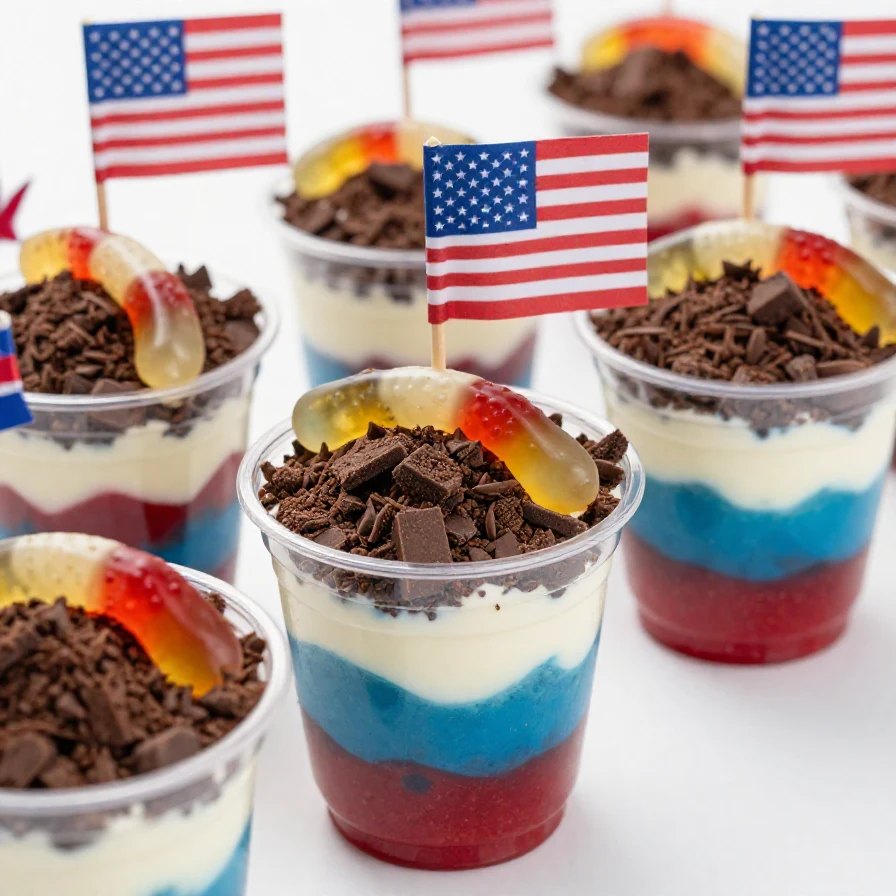
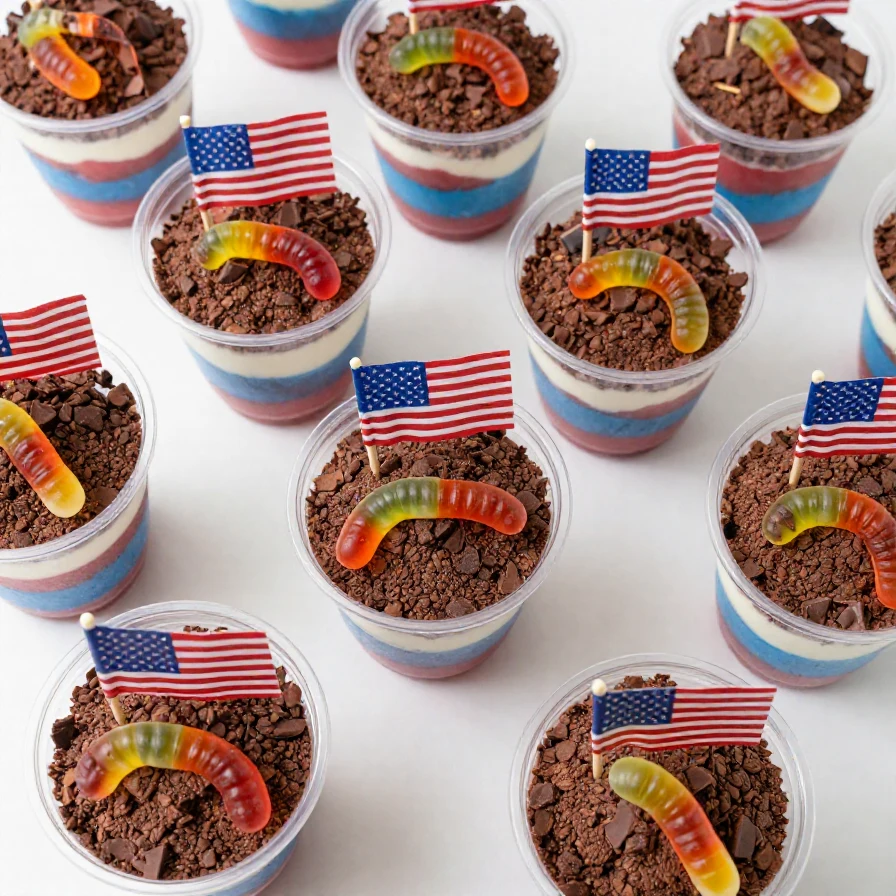
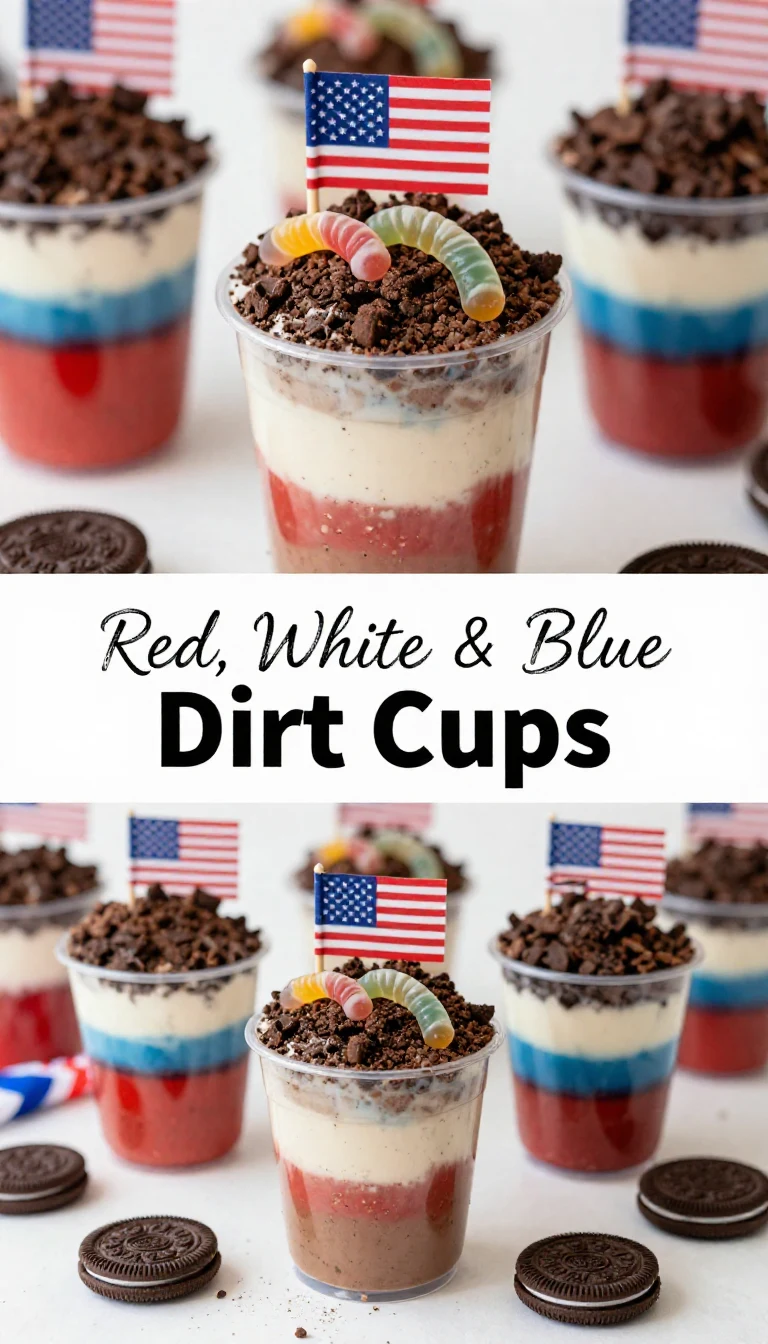
Red, White, and Blue Dirt Cups are the ultimate summer treat with their creamy vanilla pudding, layers of juicy strawberries and blueberries, and a crunchy chocolate cookie crumble that mimics the look of “dirt.” This no-bake dessert combines a luscious smooth texture with bursts of fresh fruit and a satisfying cookie crunch. Perfect for Fourth of July parties or kid-friendly celebrations, these cups deliver festive fun in every bite!
Table of Contents
- Why You’ll Love These Dirt Cups
- Everything You Need for Red, White, and Blue Dirt Cups
- How to Make Red, White, and Blue Dirt Cups Step by Step
- Pro Tips for Perfect Dirt Cups
- FAQs About Red, White, and Blue Dirt Cups
- Storing and Serving Your Dirt Cups
Why You’ll Love These Dirt Cups
- They’re easy to make and require zero baking, saving you time and effort on busy holiday weekends. Just layer the ingredients, chill, and serve for festive perfection!
- No complicated tools or techniques are needed—this recipe is beginner-friendly yet still looks stunning in presentation. Even kids can help assemble the cups, turning it into a fun family activity.
- The flavor combination of creamy vanilla pudding, fresh berries, and chocolate cookies is a winner for all ages. The contrast of textures adds a sensory delight that keeps everyone coming back for seconds.
- These dirt cups can be prepped ahead of time, making them ideal for stress-free entertaining. Chill them in the fridge, and they’re ready to wow your guests whenever you need them!
Everything You Need for Red, White, and Blue Dirt Cups
- 1 (3.4 oz) package of vanilla instant pudding mix
- 2 cups cold milk
- 1 (8 oz) container of whipped topping, thawed
- 1 cup crushed chocolate sandwich cookies
- 1 cup fresh strawberries, diced
- 1 cup fresh blueberries
- Fresh mint leaves for garnish (optional)
The vanilla pudding mix provides the creamy base that holds all the layers together. Crushed chocolate sandwich cookies add the signature “dirt” look and a rich, chocolatey crunch that perfectly complements the fresh berries.
How to Make Red, White, and Blue Dirt Cups Step by Step
- In a mixing bowl, whisk together the vanilla instant pudding mix and cold milk until well combined. Allow the pudding to sit for 5 minutes to thicken.
- Gently fold the thawed whipped topping into the thickened pudding mixture. Mix until the texture is smooth and creamy.
- In individual serving cups or bowls, start by adding a layer of crushed chocolate sandwich cookies to form the base. Pat the crumbs gently to create an even layer.
- Spoon a layer of the pudding mixture over the cookie crumbs, ensuring it covers the edges for a neat look.
 Essential CookwarePyrex Glass Mixing Bowl Set
Essential for mixing ingredients smoothly and easily, perfect for this recipe.
- Add a layer of diced strawberries over the pudding, creating a vibrant red layer. Follow with another layer of the pudding mixture to hold everything together.
- Top the cups with fresh blueberries and a sprinkle of crushed chocolate cookies for the final touch. Optionally, garnish with a fresh mint leaf for added color and freshness.
- Refrigerate the dirt cups for at least 30 minutes to allow the layers to set. Serve chilled and enjoy your festive creation!
Pro Tips for Perfect Dirt Cups
- Use clear cups or bowls to showcase the beautiful layered effect of this dessert. The vibrant red, white, and blue colors truly shine through clear containers.
- When crushing the chocolate sandwich cookies, leave some larger pieces for texture. A mix of fine crumbs and small chunks creates a more appealing “dirt” look.
- Dice the strawberries evenly so they layer neatly and provide consistent bites of fruit. This small detail enhances both presentation and taste.
- If you’re short on time, assemble these cups up to a day in advance. Store them covered in the fridge to keep the cookies crisp and the layers fresh.
FAQs About Red, White, and Blue Dirt Cups
- Can I make these dirt cups gluten-free? Yes! Simply use gluten-free chocolate sandwich cookies, and the rest of the ingredients are naturally gluten-free.
- Can I substitute the whipped topping? You can use homemade whipped cream as a substitute. Beat 1 cup of heavy cream with 2 tablespoons of powdered sugar until soft peaks form.
- Can I make these vegan? Use a dairy-free pudding mix, plant-based milk, and a non-dairy whipped topping to create vegan-friendly dirt cups.
Storing and Serving Your Dirt Cups
These red, white, and blue dirt cups can be stored in the fridge for up to 2 days. Cover each cup with plastic wrap or store them in an airtight container to maintain freshness. The cookies will soften slightly over time, but the flavor remains just as enjoyable.
If you’re serving these at a party, keep them chilled until ready to serve. Avoid leaving them out for extended periods on hot days to ensure the whipped topping and pudding stay cool and creamy.
Looking for something similar? Try our french toast cups easy breakfast recipe.
For more ideas, check out our granola berry cups – easy.
You might also enjoy our cherry-topped vanilla cake slice on.

Red, White, and Blue Dirt Cups
Ingredients
- 1 package vanilla instant pudding mix 3.4 oz
- 2 cup cold milk
- 1 container whipped topping 8 oz, thawed
- 1 cup crushed chocolate sandwich cookies
- 1 cup fresh strawberries diced
- 1 cup fresh blueberries
- fresh mint leaves for garnish (optional)
Instructions
- In a mixing bowl, whisk together the vanilla instant pudding mix and cold milk until well combined. Let it sit for 5 minutes to thicken.
- Gently fold the whipped topping into the pudding mixture until fully combined and creamy.
- In serving cups or bowls, layer the crushed chocolate sandwich cookies at the bottom, followed by a layer of the pudding mixture.
- Add a layer of diced strawberries on top of the pudding, followed by another layer of the pudding mixture.
- Top the final layer with fresh blueberries and a sprinkle of crushed chocolate sandwich cookies for a 'dirt' effect.
- Garnish with fresh mint leaves if desired. Chill in the refrigerator for about 30 minutes before serving.
Notes
Loved this recipe? Save it to your favorite Pinterest board so you can easily find it later! ✨